MCP
Model Context Protocol
Connect any MCP-compatible agent runtime to the AI Front Door MCP server. Expose tools and knowledge resources directly inside your LLM context.
Learn moreRegister your app, grab your token, and connect your agents to trusted tools, MCP servers, and knowledge resources.
AI Front Door exposes its tools, MCP servers, and knowledge resources as a platform that any developer can integrate into their own agents, services, and workflows. This page covers everything you need to get started — from registering your application and obtaining an OAuth 2.0 access token, through to running your first agent using the Exco Partners MCP server.
All API access is authenticated using OAuth 2.0. Register your application to receive a client_id and client_secret, then exchange these credentials for a short-lived access token using the Client Credentials grant. Include the access token in the Authorization header of every API request.
Choose the integration style that fits your use case. All options use the same bearer token for authentication.
Connect any MCP-compatible agent runtime to the AI Front Door MCP server. Expose tools and knowledge resources directly inside your LLM context.
Learn moreCall tools and retrieve knowledge via standard JSON REST endpoints. Ideal for backend services, orchestrators, and non-MCP agent frameworks.
Allow your agent to delegate tasks to the AI Front Door domain agent using the A2A protocol. Useful for multi-agent pipelines and escalation flows.
Learn moreRetrieve structured knowledge items, guidance, policy, and reference data — either as MCP resources or via REST — to ground your agent's responses.
Before you can call any AI Front Door API you must register an application. Registration gives you a client_id and client_secret that you use to obtain OAuth 2.0 access tokens. Tokens are scoped to an application registration and carry the permissions needed to call specific tools and knowledge endpoints.
Use the client_credentials grant to exchange your credentials for a short-lived Bearer token. Tokens expire after 3600 seconds (1 hour); request a new one when you receive a 401 response.
# Exchange client credentials for an access token
curl -X POST https://ai.excopartners.com/api/oauth/token \
  -H "Content-Type: application/x-www-form-urlencoded" \
  -d "grant_type=client_credentials&client_id=YOUR_CLIENT_ID&client_secret=YOUR_CLIENT_SECRET&scope=tools:invoke"
The token endpoint returns:
{
  "access_token": "eyJhbGciOiJSUzI1NiIsInR5cCI6IkpXVCJ9...",
  "token_type": "Bearer",
  "expires_in": 3600
}Include the access token as a Bearer token in the Authorization header of every API request:
curl -X GET https://ai.excopartners.com/api/ai/tools/rest/my-tool \
-H "Authorization: Bearer eyJhbGciOiJSUzI1NiIsInR5cCI6IkpXVCJ9..."The full OAuth 2.0 Authorization Server metadata is available at the well-known endpoint:
curl https://ai.excopartners.com/.well-known/oauth-authorization-serverYou can use an AI Front Door MCP server to get access to registered tools and knowledge resources for any MCP-compatible agent runtime. The server URL and transport details are shown on your app registration page for each tool.
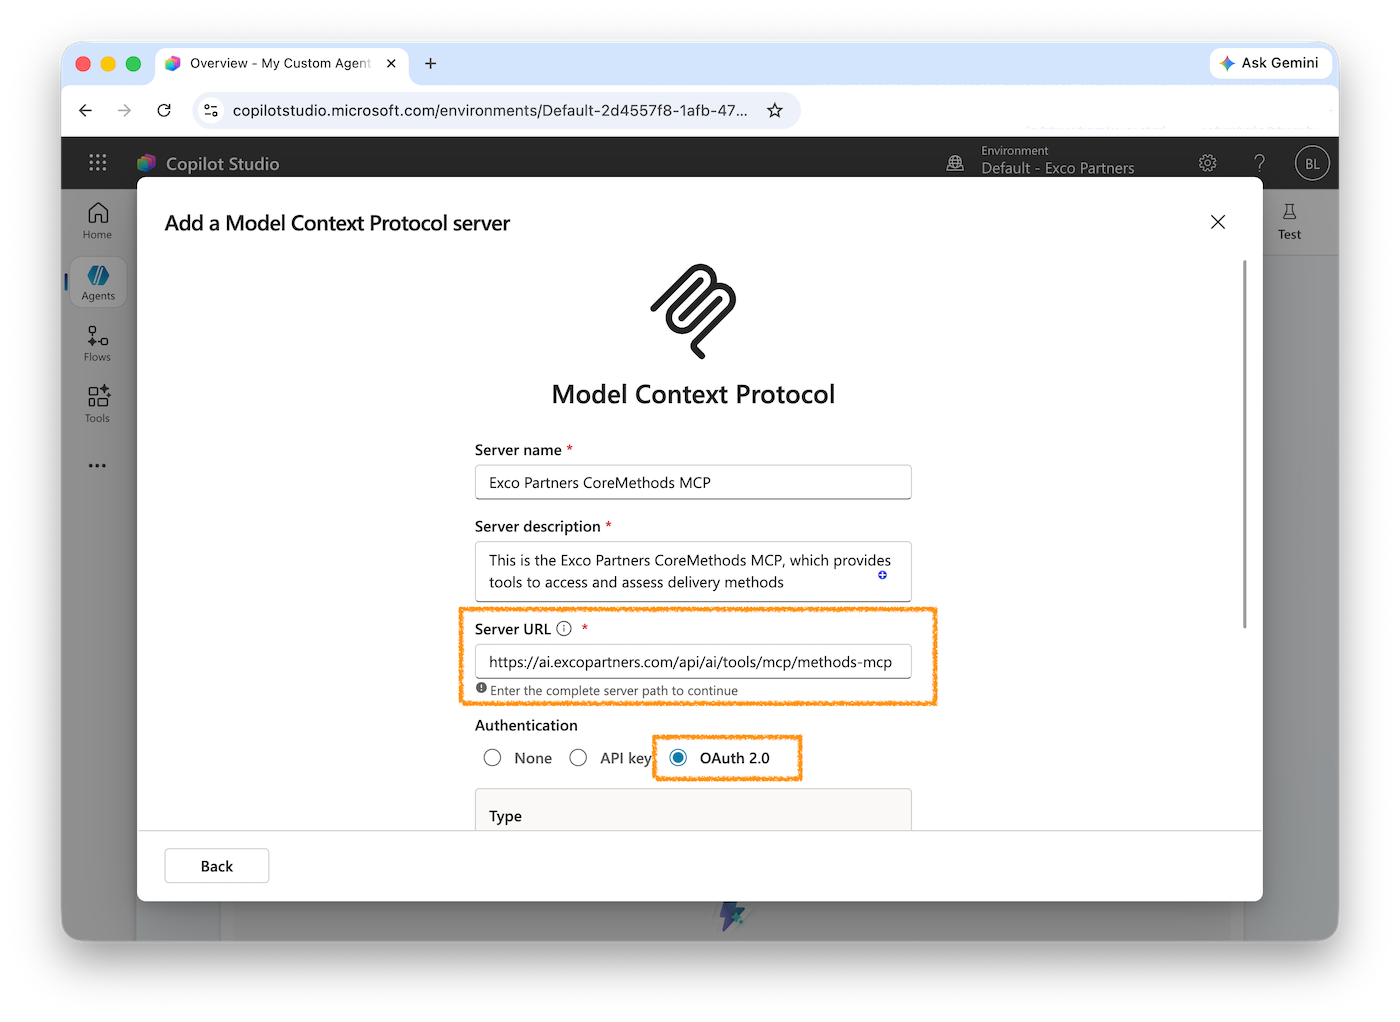
For an MCP integration, the following details are required:
• Transport: HTTP (Streamable HTTP transport)
• Server URL: e.g. https://ai.excopartners.com/api/ai/tools/mcp/methods-mcp
You will also need an OAuth 2.0 access token obtained from the token endpoint, as described in the Getting Started section above. Pass it as the Authorization: Bearer header when connecting.
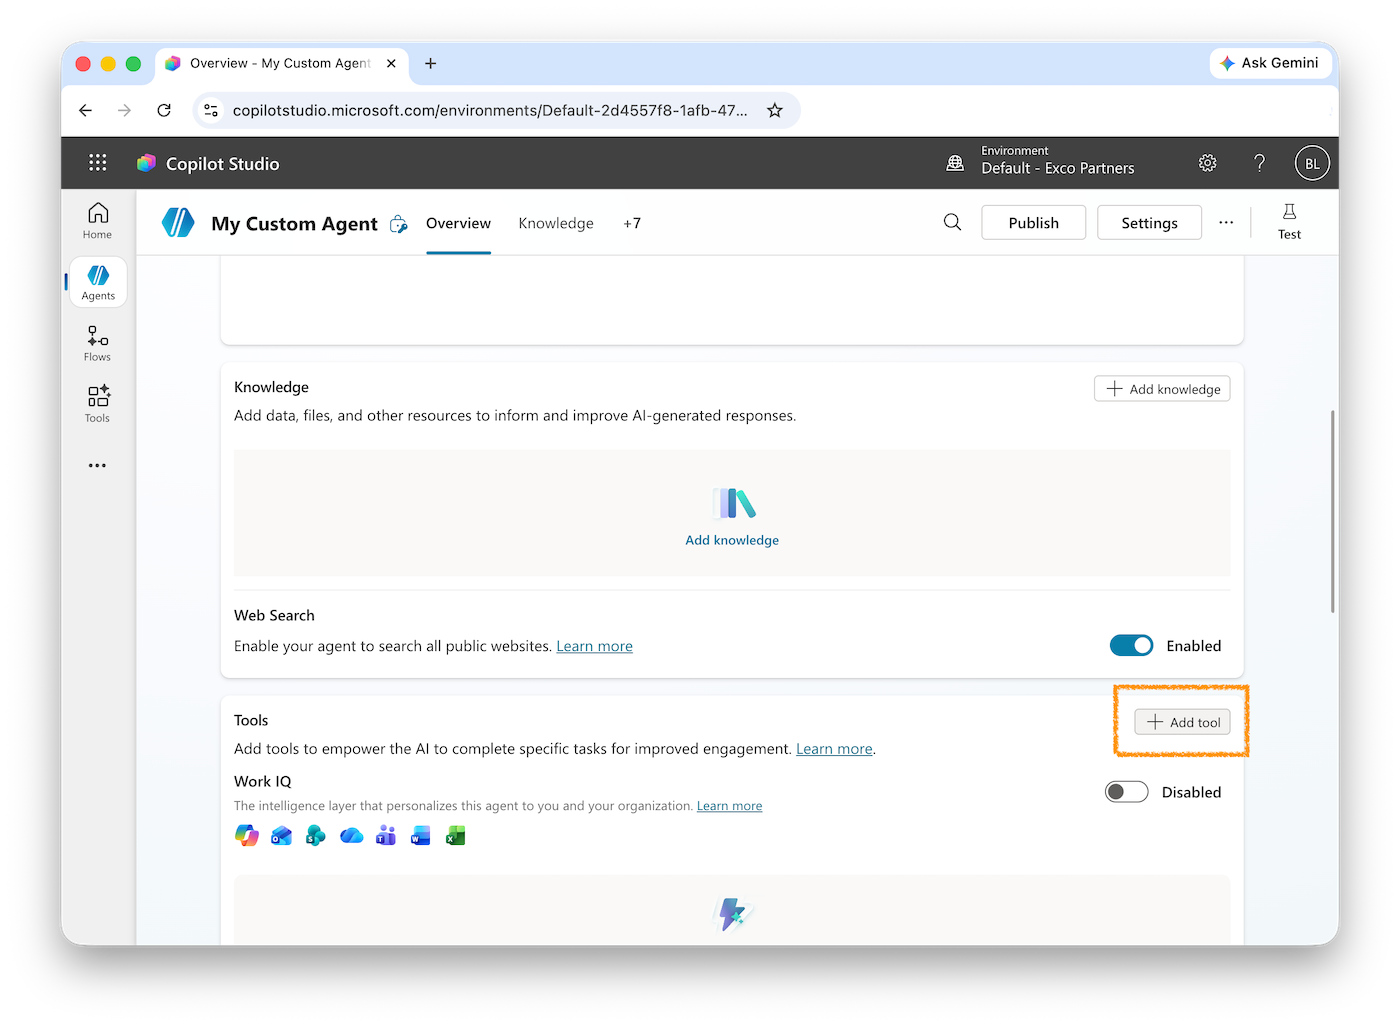
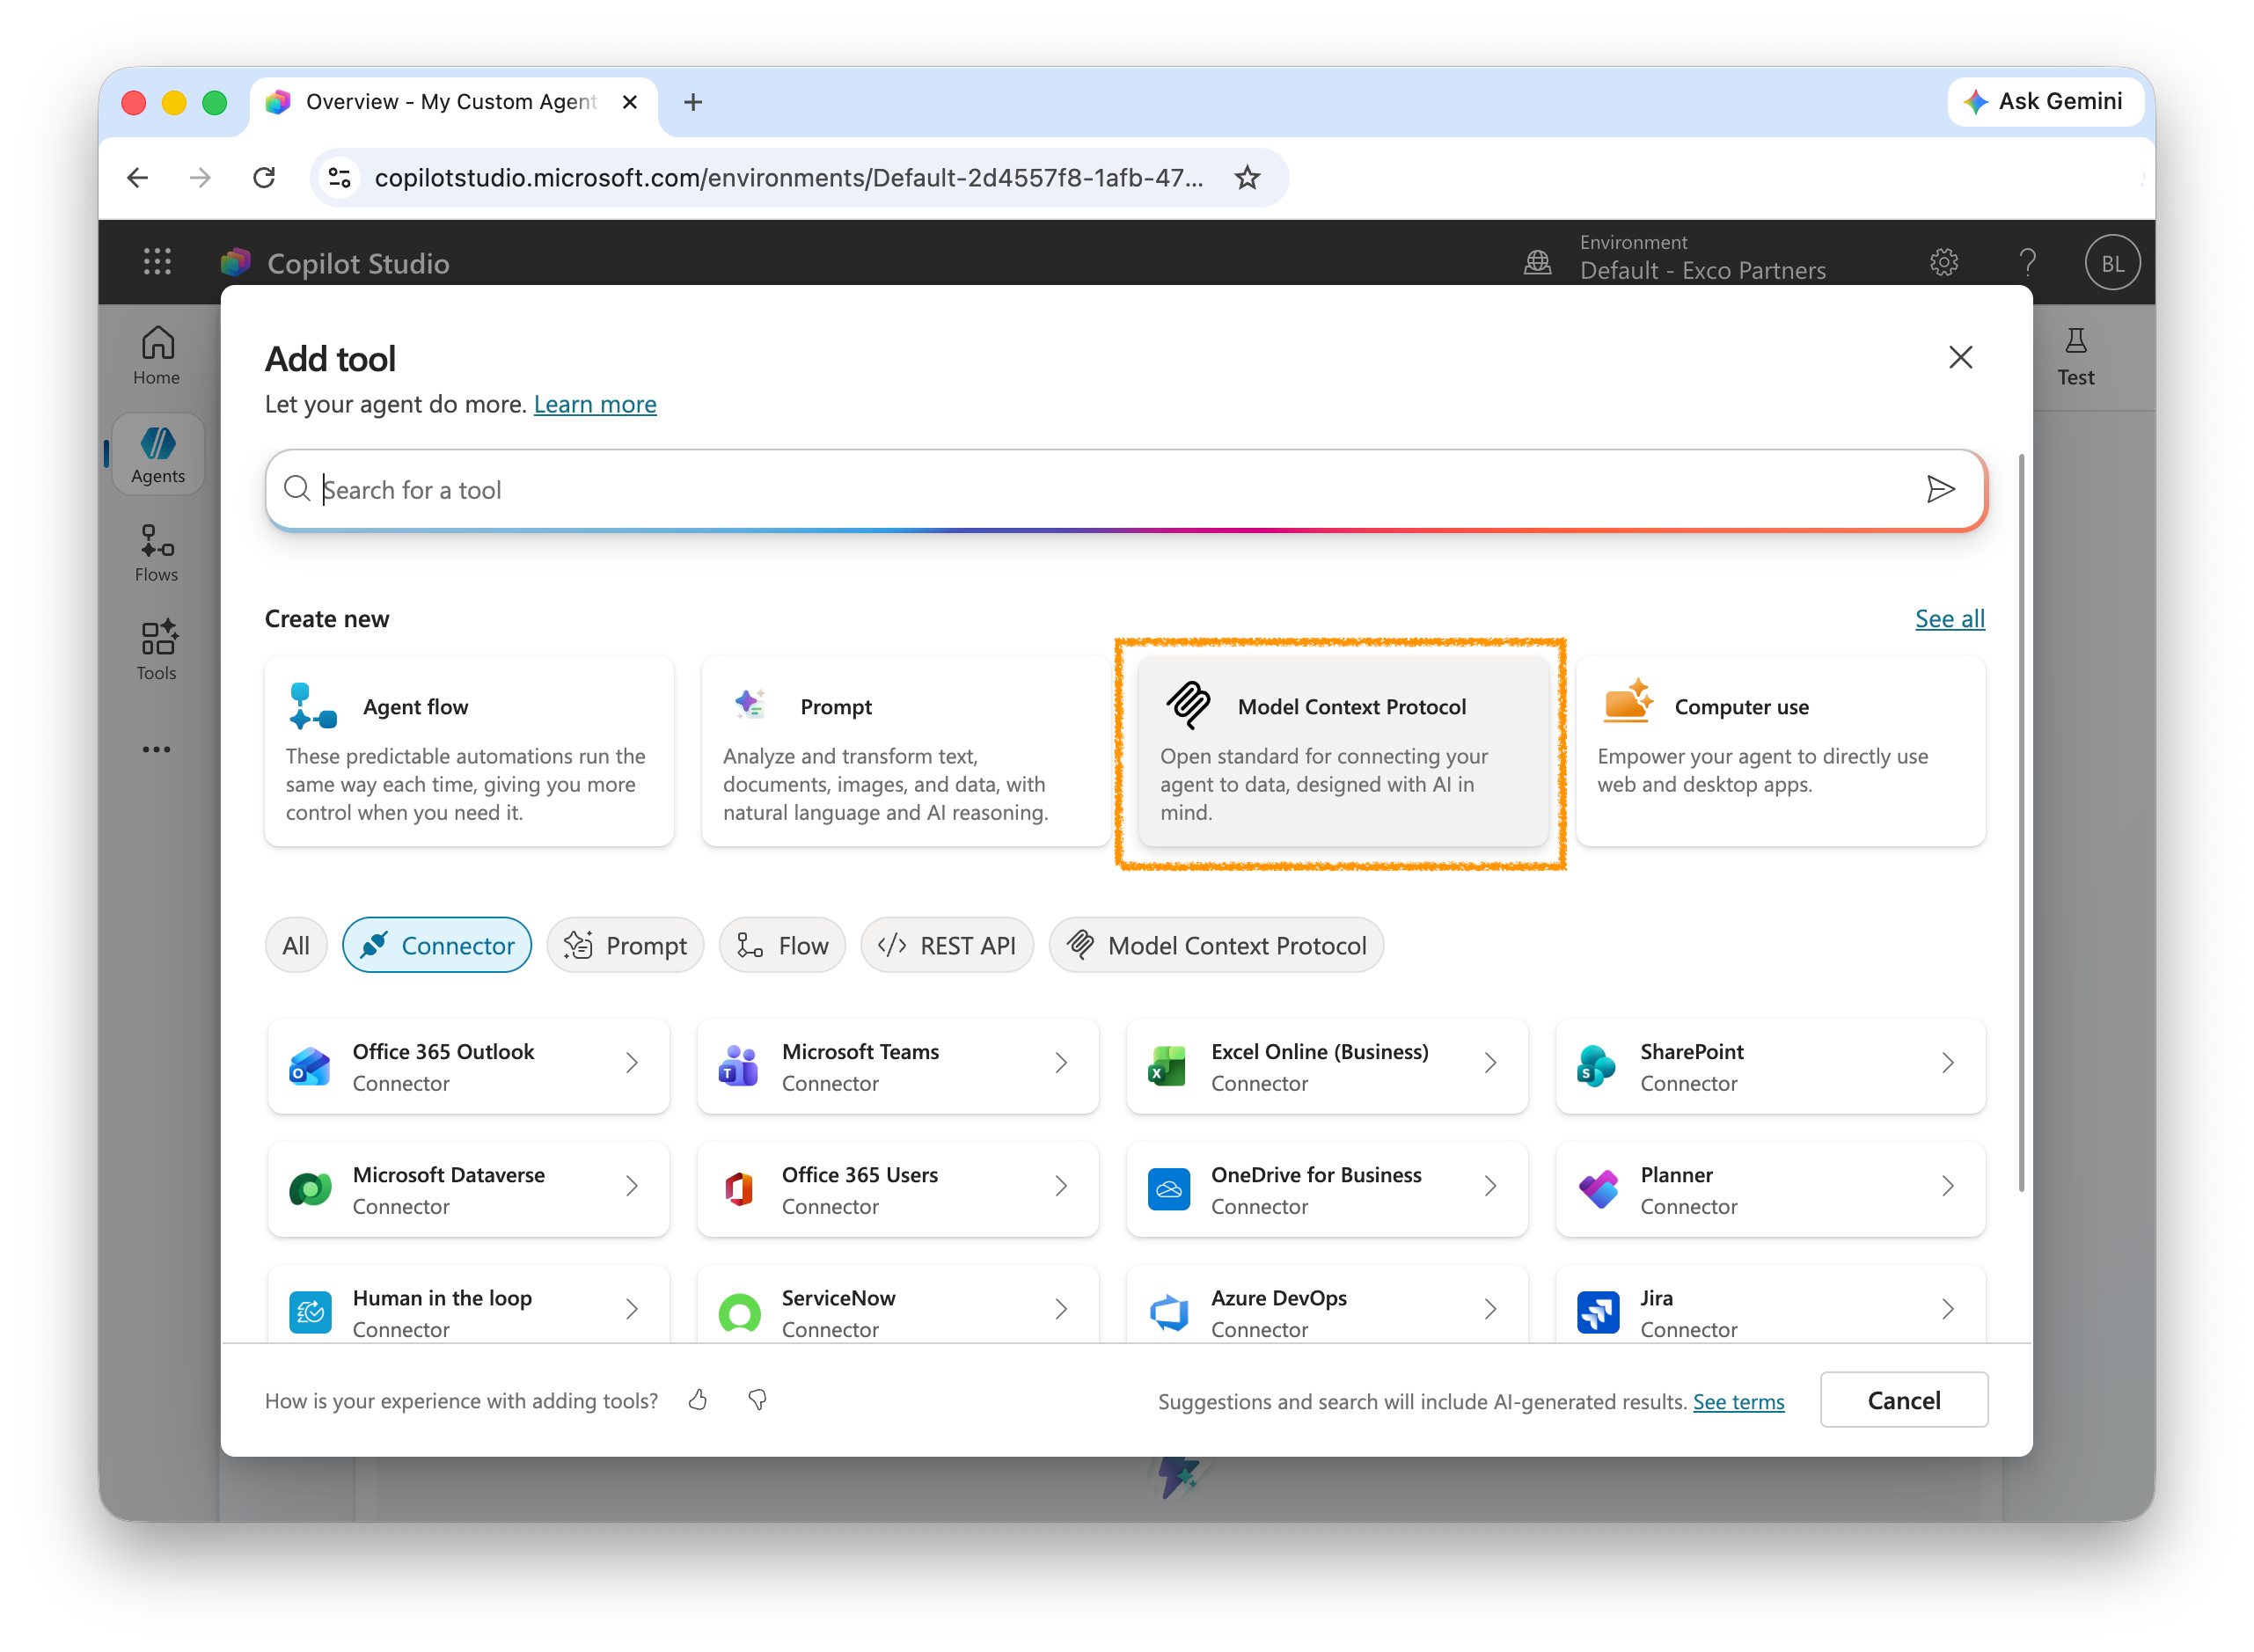
You can easily add an MCP from this site to your custom Copilot Agents.
The following example shows how to build a minimal agent using the Anthropic Claude SDK that connects to the Exco Partners MCP server via AI Front Door. The example includes OAuth 2.0 token acquisition as the first step.
npm install @anthropic-ai/sdk @anthropic-ai/mcp-clientimport Anthropic from "@anthropic-ai/sdk";
import { MCPClient } from "@anthropic-ai/mcp-client";
const AI_FRONT_DOOR_BASE = "https://ai.excopartners.com";
// Step 1: Obtain an OAuth 2.0 access token using client credentials.
async function getAccessToken(): Promise<string> {
const res = await fetch(`${AI_FRONT_DOOR_BASE}/api/oauth/token`, {
method: "POST",
headers: { "Content-Type": "application/x-www-form-urlencoded" },
body: new URLSearchParams({
grant_type: "client_credentials",
client_id: process.env.AIFD_CLIENT_ID!,
client_secret: process.env.AIFD_CLIENT_SECRET!,
scope: "tools:invoke",
}),
});
if (!res.ok) throw new Error(`Token request failed: ${res.status}`);
const data = await res.json();
return data.access_token as string;
}
const accessToken = await getAccessToken();
// Step 2: Connect to the AI Front Door MCP server.
const mcpClient = new MCPClient({
transport: "http",
url: `${AI_FRONT_DOOR_BASE}/api/ai/tools/mcp/methods-mcp`,
headers: {
Authorization: `Bearer ${accessToken}`,
},
});
await mcpClient.connect();
// Step 3: Fetch available tools from MCP.
const { tools } = await mcpClient.listTools();
// Step 4: Create the Anthropic client.
const anthropic = new Anthropic();
// Step 5: Run the agent loop.
async function runAgent(userMessage: string) {
const messages: Anthropic.MessageParam[] = [
{ role: "user", content: userMessage },
];
while (true) {
const response = await anthropic.messages.create({
model: "claude-sonnet-4-6",
max_tokens: 4096,
tools,
messages,
});
if (response.stop_reason === "tool_use") {
const toolResults: Anthropic.MessageParam = { role: "user", content: [] };
for (const block of response.content) {
if (block.type === "tool_use") {
console.log(`Calling tool: ${block.name}`, block.input);
const result = await mcpClient.callTool({
name: block.name,
arguments: block.input as Record<string, unknown>,
});
(toolResults.content as Anthropic.ToolResultBlockParam[]).push({
type: "tool_result",
tool_use_id: block.id,
content: JSON.stringify(result),
});
}
}
messages.push({ role: "assistant", content: response.content });
messages.push(toolResults);
continue;
}
const textBlock = response.content.find((b) => b.type === "text");
return textBlock?.type === "text" ? textBlock.text : "";
}
}
const answer = await runAgent(
"What are the eligibility requirements for unfair dismissal claims?"
);
console.log(answer);
await mcpClient.disconnect();# .env
AIFD_CLIENT_ID=your-client-id
AIFD_CLIENT_SECRET=your-client-secret
ANTHROPIC_API_KEY=sk-ant-...Knowledge resources are available over a plain REST API. This is useful when you want to retrieve guidance, policy documents, or reference data outside of an agent context — for example, to pre-populate RAG pipelines or build search interfaces.
First obtain an OAuth 2.0 access token using the client_credentials grant (see Getting Started above), then include it as a Bearer token in every request.
# First: get a token
TOKEN=$(curl -s -X POST https://ai.excopartners.com/api/oauth/token \
  -H "Content-Type: application/x-www-form-urlencoded" \
  -d "grant_type=client_credentials&client_id=YOUR_CLIENT_ID&client_secret=YOUR_CLIENT_SECRET&scope=tools:invoke" \
  | jq -r '.access_token')

# Then: list knowledge resources
curl https://ai.excopartners.com/api/knowledge \
-H "Authorization: Bearer $TOKEN"curl https://ai.excopartners.com/api/knowledge/unfair-dismissal-eligibility \
-H "Authorization: Bearer $TOKEN"async function getAccessToken(clientId: string, clientSecret: string): Promise<string> {
const res = await fetch("https://ai.excopartners.com/api/oauth/token", {
method: "POST",
headers: { "Content-Type": "application/x-www-form-urlencoded" },
body: new URLSearchParams({
grant_type: "client_credentials",
client_id: clientId,
client_secret: clientSecret,
scope: "tools:invoke",
}),
});
if (!res.ok) throw new Error(`Token request failed: ${res.status}`);
const data = await res.json();
return data.access_token as string;
}
async function getKnowledge(slug: string, token: string) {
const res = await fetch(
`https://ai.excopartners.com/api/knowledge/${slug}`,
{ headers: { Authorization: `Bearer ${token}` } }
);
if (!res.ok) throw new Error(`Knowledge fetch failed: ${res.status}`);
return res.json();
}
const token = await getAccessToken(
process.env.AIFD_CLIENT_ID!,
process.env.AIFD_CLIENT_SECRET!
);
const item = await getKnowledge("unfair-dismissal-eligibility", token);
console.log(item.title, item.summary);If you have a general-purpose agent that needs domain expertise it does not have, you can delegate to the AI Front Door domain agent using the A2A protocol. Your agent POSTs a task to the A2A endpoint and receives a structured result.
Authenticate with OAuth 2.0 before calling the A2A endpoint, as with all other AI Front Door APIs.
curl -X POST https://ai.excopartners.com/a2a/tasks \
  -H "Authorization: Bearer $TOKEN" \
  -H "Content-Type: application/json" \
  -d '{
    "task": "Summarise the general protections process for a small business employer",
    "context": {
      "userRole": "employer",
      "employeeCount": 12
    }
}'{
"taskId": "task_01J...",
"status": "completed",
"result": {
"summary": "Under the general protections provisions...",
"sources": [
{ "title": "General Protections Guide", "slug": "general-protections-guide" }
]
}
}Scopes are granted when you register your app. The primary scope is tools:invoke, which allows your application to call tools and retrieve knowledge resources. Request only the scopes your app needs. Additional scopes such as a2a:write (submit A2A tasks) may be available depending on your registration.
OAuth 2.0 access tokens issued by the AI Front Door expire after 3600 seconds (1 hour). When your token expires you will receive a 401 Unauthorized response. Request a new token by calling the token endpoint again with your client_id and client_secret using the client_credentials grant. There is no refresh token — simply re-authenticate when needed.
Yes. The MCP server implements the standard Model Context Protocol (2025-03-26 spec) and is compatible with any MCP-capable runtime, including OpenAI's Agents SDK, LangChain, Microsoft Copilot Studio, and open-source MCP clients. Authentication is always via OAuth 2.0 Bearer token, regardless of the runtime you use.
Rate limits are enforced per application registration. Default limits are 60 tool calls per minute and 1000 per hour. Contact us if your use case requires higher throughput.
Tool definitions are published on the Tools & Knowledge page of this portal. Each tool includes its input schema, example payloads, authentication requirements, and integration notes. You can also discover them at runtime via the MCP tools/list endpoint after connecting with your access token.